Master the iconic Moroccan bastilla recipe with this complete guide. Learn the savory-sweet secrets, step-by-step technique, and pro tips for crispy phyllo perfection.
July 6, 2026 · 11 min read
TL;DR
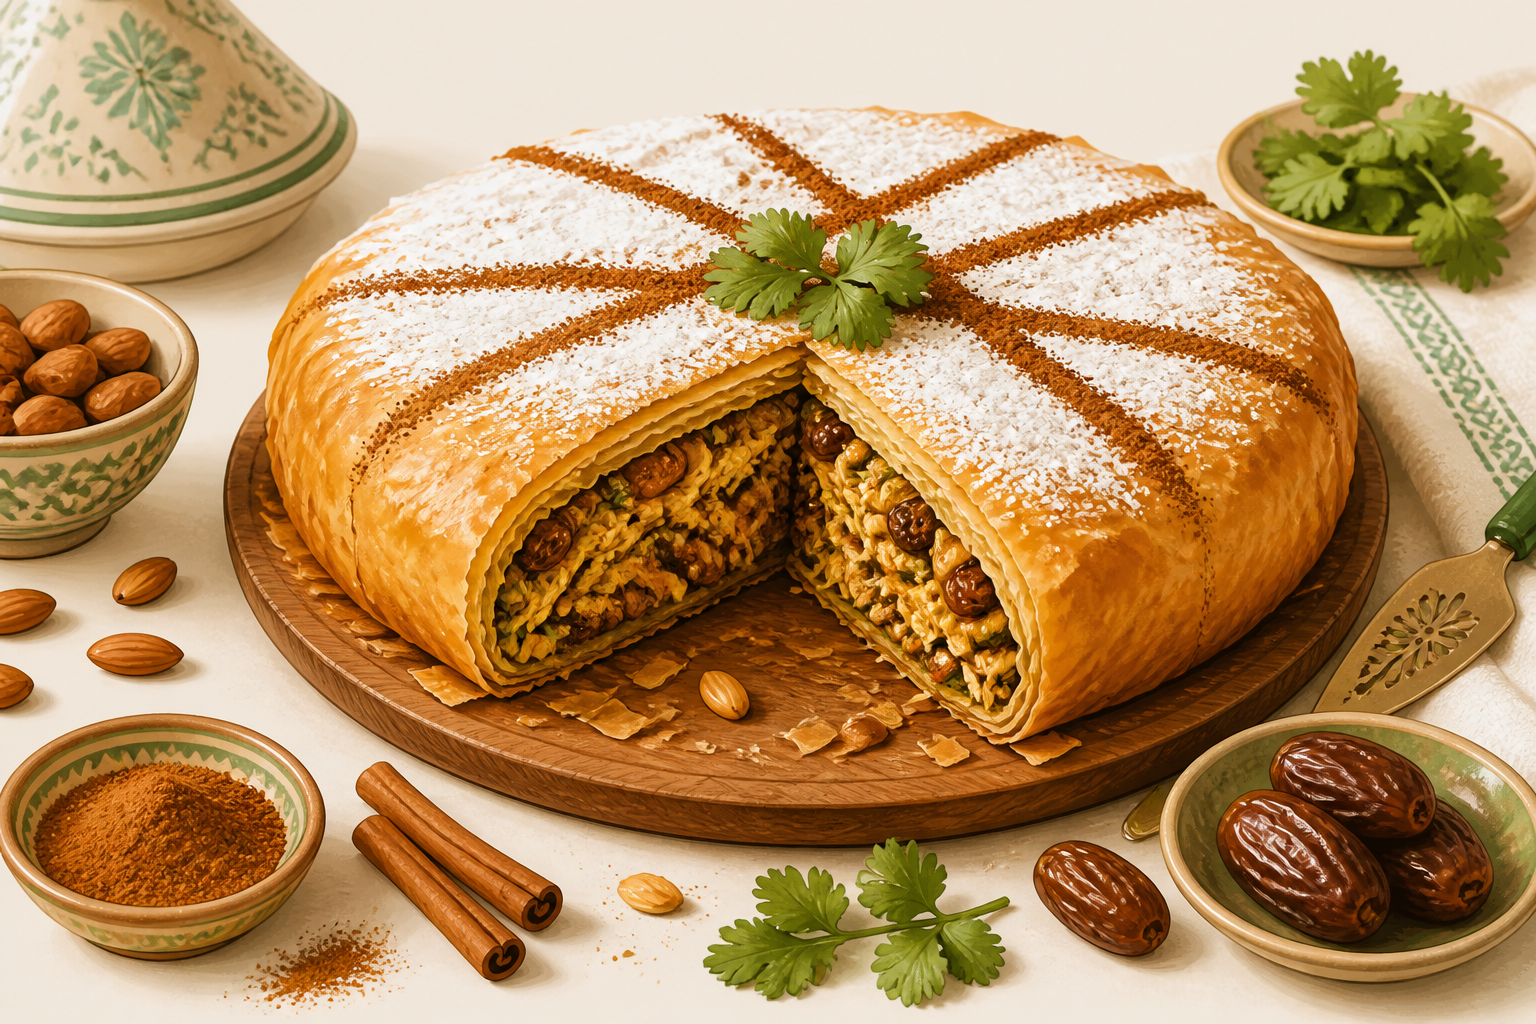
Moroccan bastilla is the ultimate savory-sweet chicken pie featuring crispy, flaky phyllo crust layered with shredded chicken cooked in warm spices, caramelized onions, toasted almonds, and dates. Despite its sophisticated reputation, it’s surprisingly achievable at home. The magic lives in the contrast: buttery golden phyllo, tender chicken filling, crunchy almonds, and a dusting of powdered sugar and cinnamon. Make the filling ahead to ease assembly day, work patiently with phyllo (keep it covered with a damp cloth), and you’ll create a showstopping dish worthy of your most important dinners. Bake until golden, dust with cinnamon, and serve immediately for the best texture and wow factor.
What is Moroccan Bastilla?
Bastilla-also spelled pastilla or b’stilla-is Morocco’s most iconic celebratory dish. The name itself comes from the Spanish word pastilla, meaning “pastry,” a linguistic echo of the dish’s medieval Andalusian roots. What you’re looking at is no ordinary chicken pie: it’s a masterclass in contrast.
The filling pairs tender, juicy shredded chicken with warm North African spices-ras el hanout, cinnamon, ginger, turmeric, a whisper of saffron. That chicken cooks down with caramelized onions until they’re sweet, dark, and jammy. Then almonds (toasted until golden), eggs (scrambled until just set), and dates (chopped into nuggets of caramel-like sweetness) layer on top. All of it wraps inside phyllo so thin and crispy that the first bite shatters on your teeth.
Then comes the reveal: dusted with powdered sugar and cinnamon, bastilla sits at the intersection of sweet and savory. It’s a celebration on a plate-which is exactly why moroccan bastilla recipe searches spike around weddings, anniversaries, and dinner parties.
The History & Cultural Significance of Bastilla
To understand bastilla is to understand the cultural crossroads that shaped North African cuisine. This dish didn’t originate in Morocco-it arrived there, and thrived.
The Andalusian Connection
The bastilla story begins in medieval Andalusia, the golden age of Al-Andalus (roughly 8th to 15th centuries), when Muslim, Christian, and Jewish cultures flourished together in what’s now Spain. The culinary traditions of that era were extraordinary: layered pastries filled with meat and spices, sweets dusted with sugar and rosewater, complex flavor profiles that prized the interplay of sweet and savory.
When Granada fell in 1492 and Andalusian Muslims fled south across the Mediterranean, they brought these culinary traditions with them. The dish evolved, absorbed Moroccan ingredients and techniques, and by the time it became a fixture of Moroccan society, it had transformed into something distinctly Moroccan-while retaining its Andalusian DNA.
Bastilla as Celebration
In Morocco, bastilla remains the ultimate dish of celebration. It appears at weddings (often made large enough to feed 20 people), milestone anniversaries, and the most important family gatherings. The effort involved in making bastilla is part of what makes it special: hours of patient cooking, careful spice balancing, precise phyllo work. This isn’t weeknight food. This is “we’re gathering the family because something matters” food.
In traditional households, making bastilla is a multi-generational event. Grandmothers teach mothers, mothers teach daughters. The techniques pass down, the flavor profiles refine, and each family develops its own bastilla signature.
Regional Variations Across Morocco
While the concept stays consistent-phyllo-wrapped chicken pie with spices and almonds-Moroccan regions have their own takes:
Fassi Bastilla (from Fez) is considered the classic preparation, with careful balance between spices, almonds, and the sweet-savory interplay. Tetouani versions (from Tetouan in the north) sometimes adjust the spice ratios and may use slightly different herb combinations. Modern cooks have created seafood bastillas using fish or shrimp, while maintaining the essential sweet-spiced-savory structure.
Each variation respects the foundational dish while reflecting local ingredient access and taste preferences.
The Essential Ingredients
A proper moroccan bastilla recipe balances just enough ingredients to create complexity without becoming overwhelming. Here’s what you need:
The Base: Chicken & Aromatics
- 2 pounds boneless, skinless chicken thighs – thighs stay juicier than breasts during the long cooking
- 1 large yellow onion, sliced – the foundation of your filling’s sweetness
- 2 garlic cloves, minced – subtle depth
- Fresh parsley and cilantro – these herbs add an essential earthiness that grounds all the warm spices
The Spices: Your Flavor Arsenal
- Ras El Hanout (2 teaspoons) – this North African spice blend is non-negotiable. It contains cinnamon, turmeric, cloves, allspice, cardamom, ginger, mace, nutmeg, and cayenne. It’s the single ingredient that says “this is Moroccan”
- Ground cinnamon (1 teaspoon) – adds warmth and sweetness
- Ground ginger (½ teaspoon) – brightens the profile
- Turmeric (¼ teaspoon) – provides golden color and earthy warmth
- Red pepper flakes (½ teaspoon, optional) – a gentle kick that makes the other spices pop
The Richness: Almonds, Dates & Eggs
- ⅓ cup sliced almonds, toasted – must be toasted first to develop their rich flavor
- 6 pitted Medjool dates, chopped – sweet, almost caramel-like
- 3 eggs, beaten – create a silky binder that holds everything together
- Fresh lemon juice (optional but recommended) – a squeeze brightens the entire filling
The Wrapper: Phyllo & Butter
- 10 sheets phyllo dough – thawed overnight, kept under a damp cloth
- ¼ cup melted butter or olive oil – for brushing layers
The Finish
- Powdered sugar – for dusting
- Ground cinnamon – for the final spice crown
Step-by-Step: How to Make Moroccan Bastilla
Making bastilla takes patience, but the steps themselves are straightforward. The entire process-filling prep, assembly, and baking-takes about 2 hours. But here’s the secret: you can make the filling up to 2 days ahead, which makes the final cooking day much calmer.
Part 1: The Filling (Can be done 1-2 days ahead)
Step 1: Brown the Chicken
Pat your chicken thighs dry and season both sides generously with salt and pepper. Heat 2 tablespoons of olive oil in a large pan over medium-high heat. Sear the chicken until golden brown on both sides-about 5 minutes total. Don’t worry about cooking it through; you’re building flavor here. Remove the chicken to a plate and set aside.
Step 2: Build the Flavor Base
In the same pan, add your sliced onions and garlic. If the pan looks dry, add another tablespoon of olive oil. Season with salt and let the onions cook over medium heat until they soften and begin to turn golden-about 6-8 minutes. This is your foundation. Don’t rush this step.
Step 3: Slow Cook the Chicken
Pour in ¾ cup of water and add all your spices (ras el hanout, cinnamon, ginger, turmeric, red pepper flakes). Stir everything together, then nestle your browned chicken back into the pan. Bring to a boil, then lower the heat to medium-low. Cover and let simmer gently for about 50 minutes, until the chicken is fall-apart tender and the cooking liquid has reduced by about half.
While this cooks, prepare your almonds. Toast them in a 350°F oven for about 10-12 minutes until fragrant and golden.
Step 4: Shred and Caramelize
Remove the chicken from the pan and set it on a cutting board. Let it cool just enough to handle, then shred it into bite-sized pieces, discarding any skin or bones.
Here’s the crucial step: leave all that cooking liquid and herb mixture in the pan. Add 1 tablespoon of honey and 2 tablespoons of powdered sugar to the onion mixture. Let it simmer over medium-low heat, uncovered, for another 30-40 minutes. What you’re doing is caramelizing the onions-evaporating the liquid and letting the onions become deep golden, jammy, and concentrated in flavor. Stir occasionally to prevent sticking. This should be completely dry with no visible liquid.
Step 5: Finish the Filling
In a separate bowl, whisk your 3 eggs until well beaten. Add them to the pan of caramelized onions and gently stir-yes, it will look a bit like scrambled eggs at first. That’s correct. Add the shredded chicken back to the pan, then fold in your toasted almonds, chopped dates, and fresh parsley. Taste and adjust salt if needed. Remove from heat.
If making ahead, let cool completely and refrigerate in an airtight container. The filling keeps for 2 days.
Part 2: Assembly & Baking
Step 6: Prep Your Phyllo
This is where people get nervous. Don’t be. Phyllo’s reputation is worse than its reality.
Thaw your phyllo in the fridge overnight (never at room temperature-it gets too warm and sticks). Take it out about an hour before you need it and let it come to room temperature. When you’re ready to assemble, unroll the stack on a clean surface and immediately cover it with a barely damp kitchen towel. The towel prevents the sheets from drying out and becoming brittle. If the towel is too wet, you’ll have dough soup; aim for just barely moist.
Step 7: Layer Your Base
Preheat your oven to 375°F. Brush a 10-inch pie dish or oven-safe skillet (cast iron works beautifully) with melted butter on the bottom and sides.
Take one sheet of phyllo, fold it in half lengthwise, and brush the top with melted butter. Lay it in the center of your pan with the ends hanging over the sides. Repeat this with 7 more sheets, rotating your pan slightly each time and layering the phyllo so it overlaps and covers the bottom of the pan completely. There should be phyllo hanging slack all around the edges. This base layer is what creates your crust on the sides.
Step 8: Add Your Filling
Spoon all of your chicken filling into the center of the phyllo nest. Smooth it into an even layer.
Step 9: Seal the Top
Take your last 2 sheets of phyllo, brush each with butter, and lay them over the top of your filling. Fold the hanging phyllo pieces up and over to cover the top-it doesn’t need to be neat. The rustic look is actually authentic to traditional bastilla. Brush the top generously with melted butter.
Step 10: Bake to Golden Perfection
Bake at 375°F for 15-20 minutes, until the phyllo is golden brown and crispy. Rotate the pan halfway through to ensure even browning on all sides.
Step 11: The Grand Finish
Remove from the oven. While still hot, use a fine sieve to dust the top generously with powdered sugar, then a sprinkle of ground cinnamon, forming decorative lines if you’re feeling fancy. This sweet-spice top is part of bastilla’s signature.
Serve immediately while the phyllo is still crackling. Cut into wedges and plate with the sweet-dusted crust facing up.
Pro Tips for Bastilla Success
Phyllo Confidence: The only real trick to working with phyllo is patience and that damp towel. Dry phyllo cracks, but phyllo under a damp cloth stays pliable. And if a sheet tears? No one will know. The other layers cover it. Don’t let perfection become the enemy of delicious.
Timing Flexibility: You can make the filling days ahead. You can assemble the bastilla a few hours before baking (cover loosely with plastic wrap). What you can’t do well is bake it ahead and reheat-the phyllo loses its crispness. Cook it fresh when your guests are about to arrive.
Freezing Option: Fully assembled but unbaked bastilla freezes beautifully for up to 2 months. Bake from frozen; just add 5-10 extra minutes to your baking time.
The Egg Scramble: Some recipes skip the eggs entirely; others insist they’re essential. The eggs add creaminess and help bind everything. They must be cooked through and not runny, or excess liquid will make your phyllo soggy.
Spice Customization: Ras El Hanout is your shortcut to authenticity, but if you can’t find it, combine 1 teaspoon cinnamon + ½ teaspoon turmeric + ¼ teaspoon ginger + ¼ teaspoon cumin + pinch of cayenne and saffron. Adjust to your taste.
What to Serve Alongside Your Bastilla
Bastilla is rich and satisfying enough to anchor an entire meal, but companions enhance it. Consider:
- A bright salad: Moroccan carrot salad with preserved lemon and cilantro offers citrus contrast
- Roasted vegetables: Warm roasted vegetables add color and textural balance
- Chickpea dishes: A simple chickpea and spinach side lets the bastilla remain the star
- Couscous: Buttered couscous soaks up any filling that escapes your wedge
Serve bastilla hot, at the center of your table, with everyone gathered around. This is celebration food-let it have the spotlight.
Bastilla Variations Worth Trying
While the classic chicken version is definitive, ambitious cooks enjoy exploring:
Seafood Bastilla: Replace the chicken with flaked fish or shrimp. Use fish stock instead of water for deeper flavor. The rest stays the same.
Vegetarian Bastilla: Substitute shredded mushrooms and lentils for the chicken, cooking them with the same spice mixture until tender.
Individual Portions: Make 4-inch individual bastillas in a muffin tin instead of one large pie. They’re elegant for dinner parties and easier to portion.
Large Format: For feeding a crowd, double your filling and assemble in a 13-inch shallow round tin. Follow the same method but bake for 35-40 minutes.
Try ViAFrance
ViAFrance.store specializes in both French and Moroccan cuisine, celebrating the culinary traditions that made this dish possible. Whether you’re looking for other Moroccan recipes, step-by-step cooking guides, or inspiration for your next celebration dinner, ViAFrance brings the warmth of “cook with love, serve with pride” to every kitchen. Their collection of authentic recipes and techniques makes exploring global cuisine accessible and joyful.
Frequently Asked Questions
What’s the difference between bastilla and pastilla?
They’re the same dish! Bastilla, pastilla, and b’stilla are just different spellings of the Moroccan chicken pie. The name comes from the Spanish word “pastilla,” meaning pastry. All refer to the crispy phyllo-wrapped savory-sweet chicken pie.
Can I make moroccan bastilla with phyllo instead of traditional warqa dough?
Absolutely. While traditionally made with warqa (paper-thin pastry), modern home cooks use phyllo dough, which you can find in any supermarket freezer. Phyllo is thicker than warqa but still creates a deliciously crispy crust when brushed with butter or olive oil.
How far in advance can I prepare bastilla filling?
The chicken filling can be made 1-2 days in advance and refrigerated. This actually makes assembly easier. However, avoid assembling the entire pie more than a few hours early, as phyllo can absorb moisture. For longer storage, freeze uncooked assembled bastilla for up to 2 months.
What can I substitute for the dates in bastilla?
Dried apricots, dried cherries, or raisins work as alternatives, though they’ll shift the flavor profile slightly. Apricots offer a tangier sweetness, cherries add tartness, and raisins provide classic richness. Experiment to find your preference.
Is making moroccan bastilla really difficult?
Not at all! While the prep takes time (about an hour total), the steps are straightforward. The trickiest part is working with phyllo dough, but with a damp towel to keep unused sheets moist, even first-time cooks succeed. Most home cooks report success after one attempt.